Introduction
The Raspberry Pi is a small, single-board computer that can be used to learn programming, create media and even build robots. It's also one of the most popular devices for DIY projects around the world.
Some of its salient features include:
- Central Processing Unit (CPU) which carries out instructions using logical and mathematical operations, with the Raspberry Pi making use of the ARM11 series processor on its boards.
- HDMI port, which can be used to connect the device to a computer monitor or TV.
- GPIO pins, which allow connection to a range of peripherals and electronic components.
- Affordable cost, making it accessible for a wide range of users.
The Raspberry Pi was developed by the Raspberry Pi Foundation in 2009 with the goal of promoting basic computer science education and encouraging children (and adults!) to learn how computers work.
The foundation has since sold over 10 million units worldwide at an affordable price point starting from 3500/- per device (Raspberry Pi 3B) a fraction of what other similar technologies cost!
Gathering the Necessary Materials
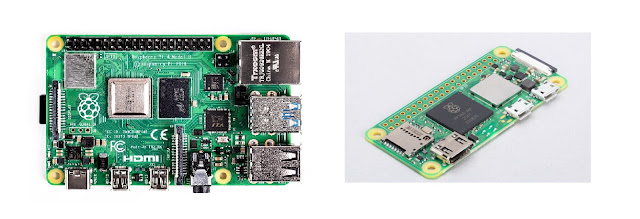
- Raspberry Pi Model
- Power Supply
- MicroSD Card (8GB or larger)

- Monitor (HDMI-compatible) and HDMI cable to connect it to your Raspberry Pi.

- Keyboard and mouse, if you don't have a wireless keyboard/mouse combo already.

Preparing the MicroSD Card
Now that you have your Raspberry Pi, it's time to get started with the setup. The first thing you need to do is download the OS image for your Raspberry Pi model and flash it onto a MicroSD card. This process varies depending on which operating system you choose:
Once you've downloaded and unzipped the file containing your chosen OS, insert your MicroSD card into an appropriate adapter (if necessary) and connect it via USB cable or adapter into one of your computer's free USB ports. Open Etcher if using Windows or macOS; Linux users can skip this step as Etcher comes pre-installed on most distributions of Linux. Once open, select "Select Image" from within Etcher's dropdown menu at top left corner of window; then select "Browse..." from same dropdown menu again; select .img file from wherever it was saved earlier when downloading said file above! Now click "Open," followed by clicking "Flash!".
Another way of flashing raspberry pi OS into MicroSD card is using "Raspberry Pi Imager". Setting up a Raspberry Pi using Raspberry Pi Imager is a straightforward process that can be completed in just a few steps. Here's how to do it:
- Download and install Raspberry Pi Imager on your computer.
- Insert the SD card you want to use with your Raspberry Pi into your computer's SD card reader.
- Open Raspberry Pi Imager and select the operating system you want to install on your Raspberry Pi.
- Choose the SD card you inserted earlier as the target device for the operating system installation.
- Click on the "Write" button to start the installation process.
- Once the installation process is complete, remove the SD card from your computer and insert it into the Raspberry Pi.
- Connect the Raspberry Pi to a monitor, keyboard, and mouse.
- Power on the Raspberry Pi by connecting it to a power source.
- Follow the on-screen instructions to complete the setup process.
- Create a empty file named "ssh" without extension.
- Create file names " wpa_supplicant.config" and copy paste following code into it.
- Update your network ssid and password along with alias (optional)
- Move both the file into MicroSD Card.
- If Raspberry pi Imager is used, there is no need to follow this step as it is already setup during flashing memory card.
Connecting the Peripherals
- Connect the monitor to Raspberry Pi's HDMI port and turn it on.
- Connect your keyboard, mouse and other peripherals to your Raspberry Pi.
- Connect the power supply to Raspberry Pi and switch on.
Testing the Setup
Now that you have your Raspberry Pi set up and ready to go, it's time to test it out!
First, make sure your operating system is working correctly by verifying the version number. This can be done by opening a terminal window and entering:
- sudo apt-get update && sudo apt-get upgrade -y
If this command returns "command not found", then you may need to install some packages first before continuing with these instructions. To do so, run the following commands in order:
- sudo apt-get install git python3 python3-pip -y *
- sudo pip3 install --upgrade pip && sudo pip3 install --upgrade setuptools && sudo pip3 install wheel && sudo easy_install3 wheel
Benefits of Raspberry Pi
- Low cost: The Raspberry Pi is a single-board computer that's accessible to a wide range of users. It's also affordable, which means you can buy one for your kids or students and have them learn how to program without breaking the bank.
- Accessible for a wide range of users: The Raspberry Pi was designed specifically with beginners in mind. This makes it easy for anyone who wants to get started with programming and electronics, but doesn't know where to start!
- Versatility: Because this device can be used as both an operating system (OS) and an embedded system (ES), it has many uses beyond simply being an OS or ES alone--you can even use it as part of larger projects like robotics!
- Huge online support: There are plenty of resources available online if you ever need help using or configuring your Raspberry Pi; from tutorials on how-tos all the way through forums where people discuss specific projects they've undertaken using RPi boards."
Application of Raspberry Pi
Raspberry Pi has a wide range of applications and can be used for various purposes. Here are a few examples:
Home automation: Raspberry Pi can be used to control various household devices such as lights, security systems, and appliances. It can also be used to create a smart home system that can be controlled remotely using a smartphone or a computer.
Media center: Raspberry Pi can be used as a media center to stream movies, TV shows, and music. It can be connected to a TV and controlled using a remote or smartphone.
Gaming: Raspberry Pi can be used to build retro gaming consoles or arcade machines. It can run various emulators that allow users to play games from old consoles such as NES, SNES, and Sega Genesis.
Education: Raspberry Pi can be used as a learning tool for programming and electronics. It is used in many schools and universities to teach computer science and engineering.
Robotics: Raspberry Pi can be used to control robots and drones. It can be used to program various sensors and motors to create a wide range of robots for different applications.
Internet of Things (IoT): Raspberry Pi can be used to create various IoT devices such as weather stations, home security systems, and smart doorbells. It can be connected to various sensors and cameras to collect data and send it to the cloud for analysis.
These are just a few examples of the many applications of Raspberry Pi. Its versatility and low cost make it an ideal platform for various projects and applications.
Troubleshooting
Troubleshooting the Operating system
If you are having issues with your operating system, first make sure that you have updated your Raspberry Pi to the latest version. To do this, open up a terminal window and enter:
sudo apt-get update && sudo apt-get upgrade -y
This will ensure that all of the packages on your system are up to date. If this does not fix your issue, then try reinstalling Raspbian from scratch by following these steps:
- Unmount all drives connected to Raspberry Pi (if any) by typing "sudo umount /dev/sda1" where sda1 is whatever drive letter corresponds with yours. This can be found by running "df -h" in a terminal window and looking for lines starting with "/dev/". Once all drives have been unmounted successfully type "sudo dd bs=4M if=/path/to/imagefile_name_here of=/dev/sdX" replacing "/path/to/" with wherever you saved your image file and replacing "/dev/sdX" with whatever drive letter corresponds with yours (this can be found using df -h).


